
Christmas Lights and Snow: Easy Tips for Stunning Photos
Christmas lights and snow create one of the most magical scenes of the year. When both show up together, your home becomes the perfect backdrop for winter photos. With a few simple adjustments, you can capture images that feel warm, festive, and timeless.
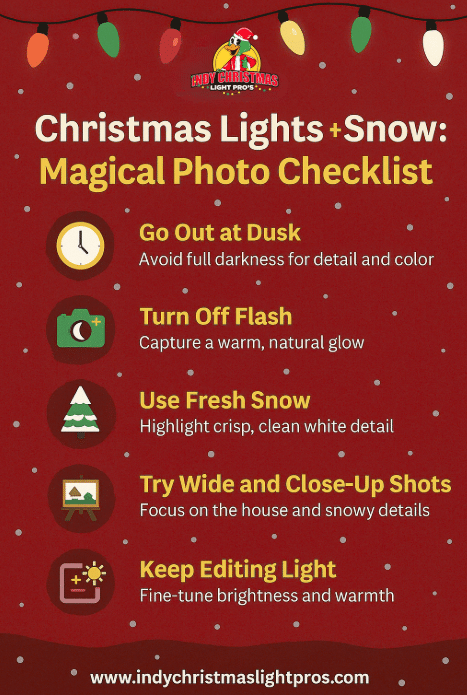
This guide explains how to photograph Christmas lights and snow without fancy gear or professional training.
Why Christmas Lights and Snow Look So Magical Together
Christmas lights and snow work well because they reflect light naturally. Snow brightens the scene while lights add warmth and contrast. Together, they soften harsh shadows and create depth.
As a result, photos feel brighter and more balanced. That balance makes your home stand out in winter landscapes.
When to Photograph Christmas Lights for Best Results
The Best Time for Photos
The best time to capture Christmas lights and snow is just after sunset. This window is called blue hour. The sky still holds color, and your lights glow clearly.
Avoid full darkness if possible. Early evening keeps detail in your home visible while letting lights shine.
How Fresh Snow Improves Christmas Light Photos
Fresh snow reflects light better than packed or melting snow. Because of this, photos look cleaner and brighter right after snowfall.
If possible, take photos within a few hours of snow ending.
Camera Settings for Christmas Lights Photography
Basic Settings for Christmas Lights
Use night mode if you are on a phone. For cameras, lower your ISO to reduce grain. Increase exposure slightly to capture snow detail.
Turn off flash. Flash flattens the scene and washes out lights.
Focus Tips for Christmas Lights and Snow Scenes
Tap to focus on the lights, not the snow. This keeps bulbs crisp and prevents blur. If your camera allows, lock focus before shooting.
Best Angles to Photograph Lights and Snow
Wide Shots Show the Full Winter Scene
Step back and include trees, rooflines, and pathways. Snow-covered ground adds texture and depth.
Wide shots work best when your lighting design feels balanced.
Close-Ups Shots
Zoom in on wrapped trees, bushes, or roof edges. Snow clinging to lights adds character and sparkle.
These shots work well for social media and holiday cards.
How to Prepare Your Home Before Taking Photos
Before shooting, check for outages or dark spots. Replace burned-out bulbs if needed. Brush heavy snow off fixtures so lights remain visible.
Clean lines and even lighting always photograph better.
Editing Tips for Christmas Lights Photos
Use light edits only. Increase brightness slightly. Add contrast gently. Avoid heavy filters.
Warm tones help counter cold snow colors. Subtle warmth keeps the photo inviting.
Why Professional Installations Photograph Better
Professionally installed lights sit evenly and securely. Designs follow the architecture of your home. As a result, photos look intentional and polished.
At Indy Christmas Light Pros, we design displays that look just as good in photos as they do in person.
Final Thoughts on Photographing Christmas Lights and Snow
Christmas lights and snow create moments worth capturing. With the right timing, angles, and settings, your home can look magazine-ready.
Take your time. Enjoy the process. Let the season shine.
If you’re in Indianapolis, Carmel, Fishers, Westfield, Noblesville, or Center Grove, Indy Christmas Light Pros can help create a display that looks magical in every snowfall.